Essentials for YOOtheme Pro
Google Integration
The Google integration is available through Google Business Profile Source, Google Calendar Source, Google Places Source, and Google Sheets Source, as well as the Google Sheets Action.
For enhanced security and control, you can create a custom Google developer app and use its OAuth credentials with the Google Auth driver when configuring Google sources or actions. This process is covered in greater detail by the official Google guide, while the next steps summarize the Essentials setup path.
1. Create Google Cloud Project
Login with your Google account to the Google Cloud Console and create and/or choose a project where to manage the custom oAuth credentials.
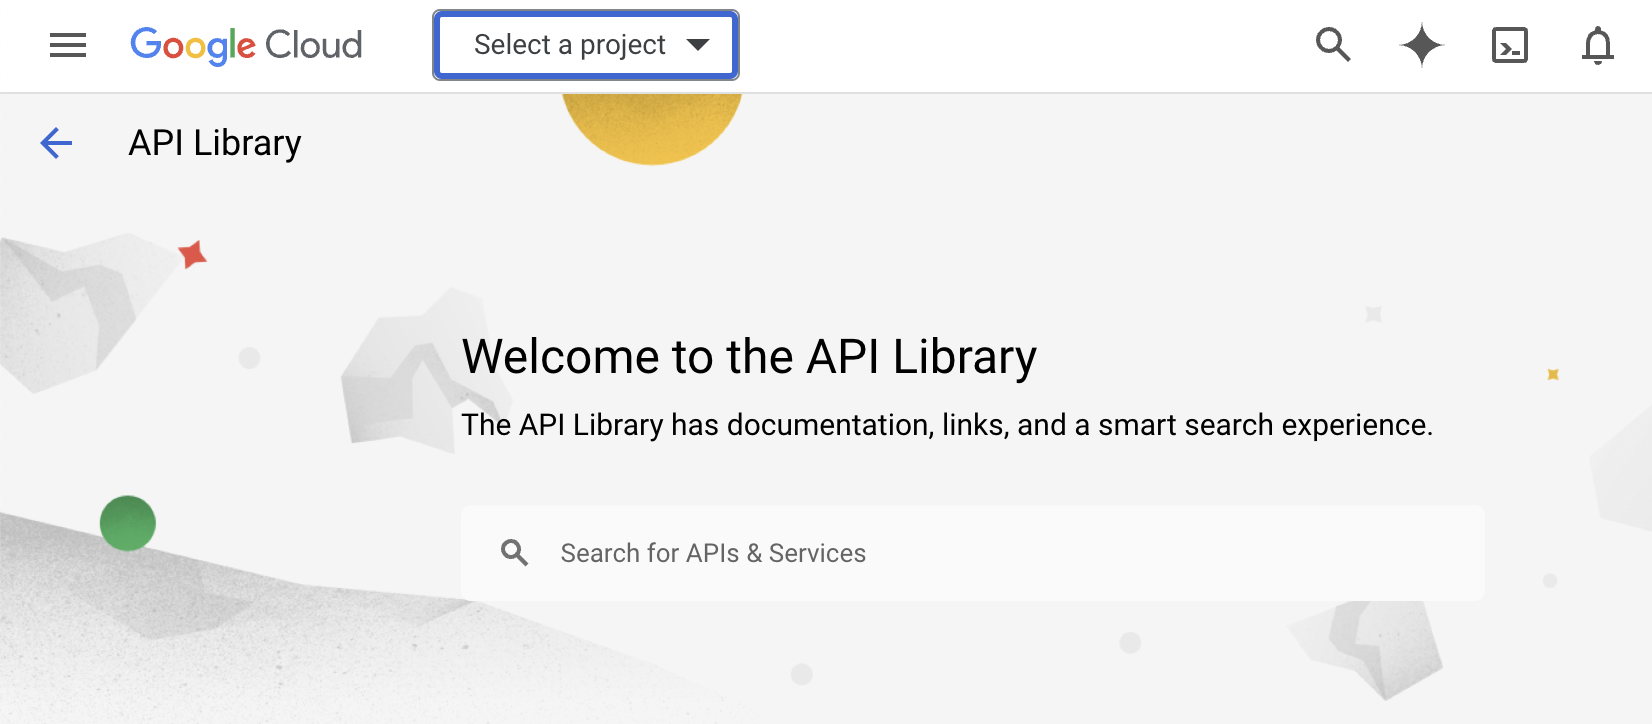
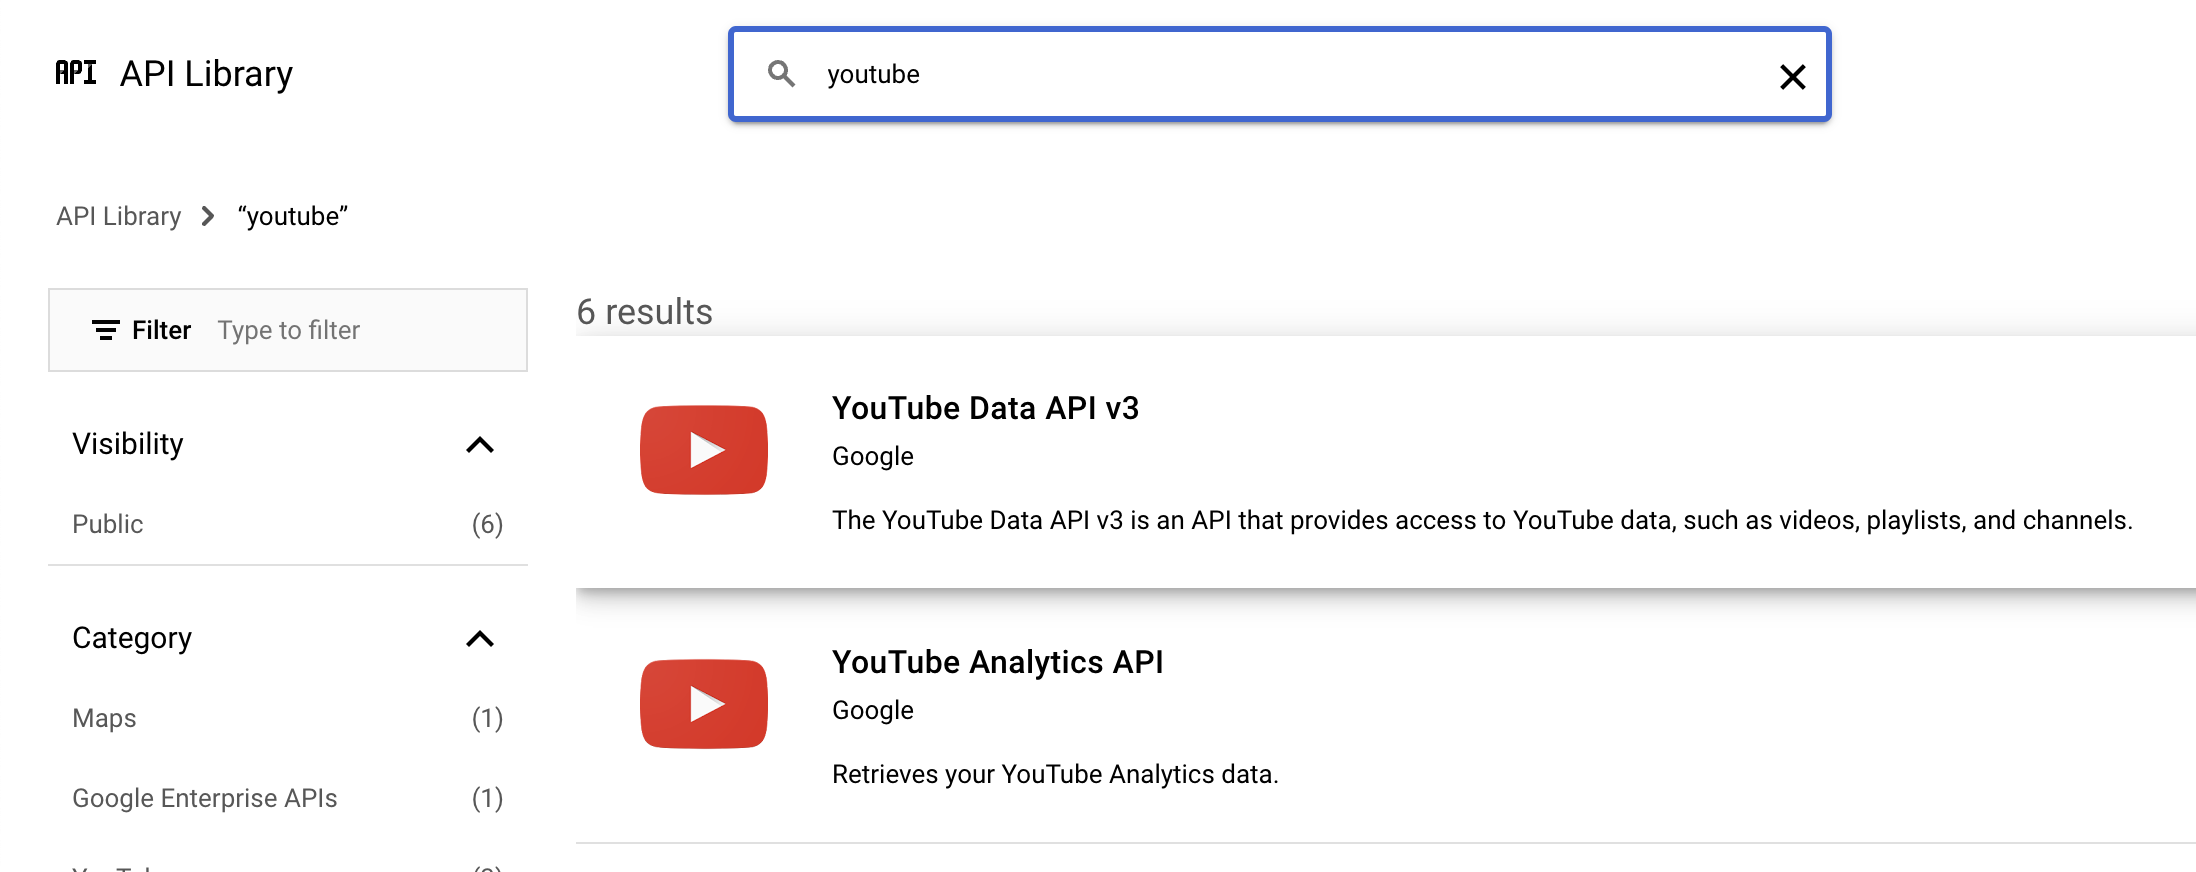
2. Enable Google APIs
Go to the Google Cloud Console API Libraries and enable the APIs you need. For example, for Google Sheets enable the Google Sheets API, for Google Calendar the Google Calendar API, and for Google Business Profile the required Business Profile APIs.
TIP
You can either create one project for each API, or a single-project for every API. It's up to you and your security policies.
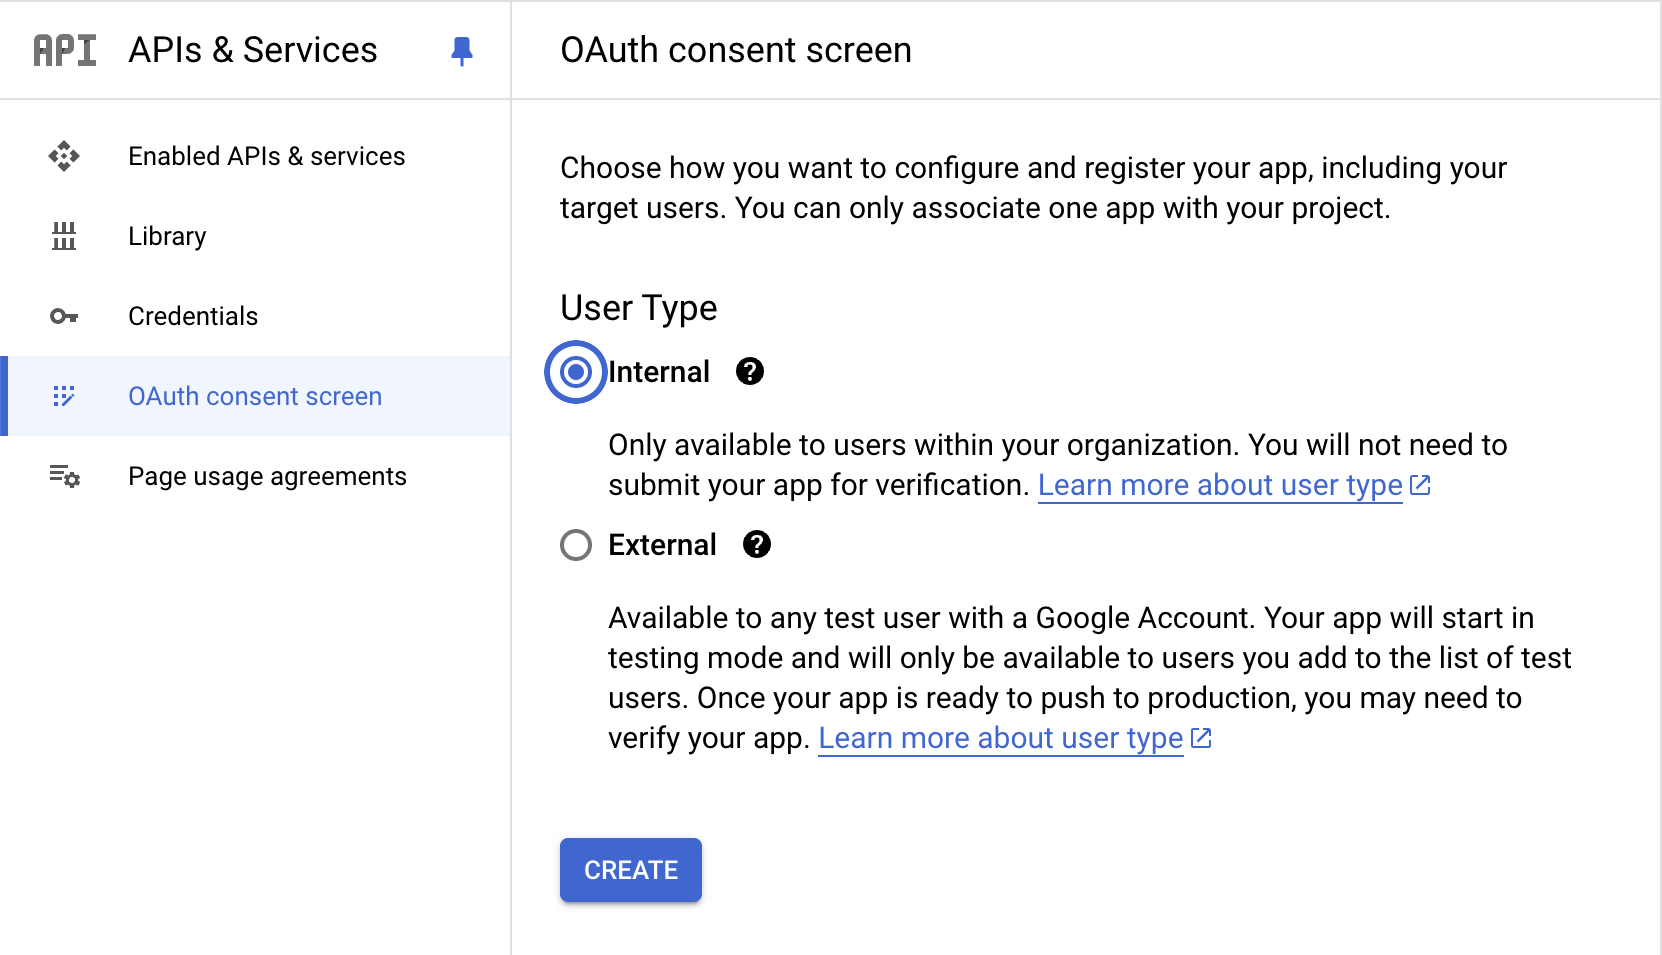
3. Create oAuth Consent Screen
Go to the console oAuth Consent Screen Page and choose Internal as the User Type. Follow through the form to fullfill all the necessary data.
In the scopes section you would usually match the scopes for the APIs you have enabled previously. Refer to the following table as the scopes required by Essential addons.
| Scope | Addon |
|---|---|
| https://www.googleapis.com/auth/business.manage | Google Business Profile Source. |
| https://www.googleapis.com/auth/drive.readonly | Google Sheets Source and Google Sheets Form Action |
| https://www.googleapis.com/auth/spreadsheets | Google Sheets Source and Google Sheets Form Action |
| https://www.googleapis.com/auth/calendar.readonly | Google Calendar Source |
| https://www.googleapis.com/auth/calendar.events.readonly | Google Calendar Source |
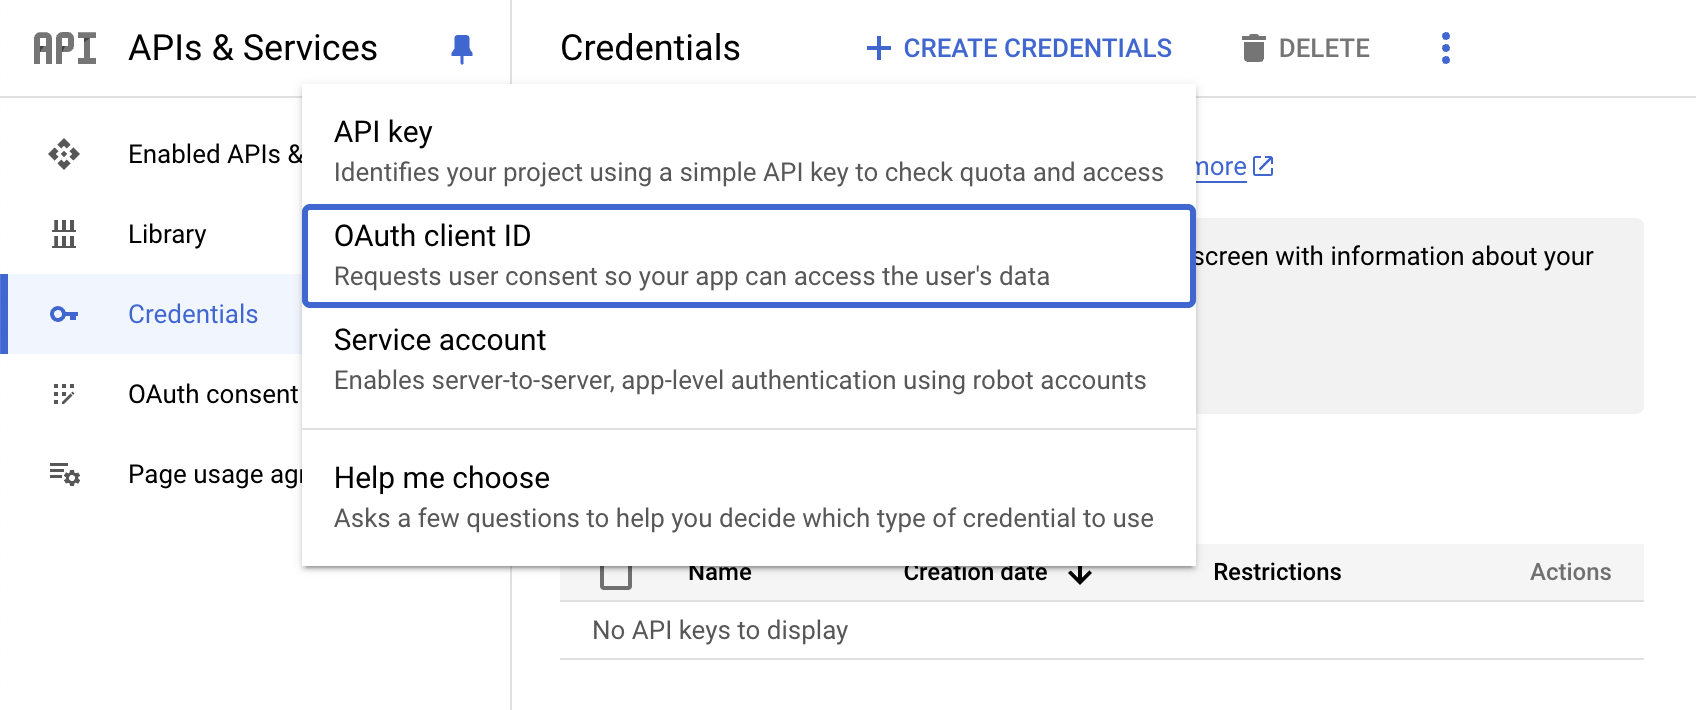
4. Create oAuth Client ID
Go to the console Credentials Page and create an oAuth Client ID. Select Web Application and set a name. For the URL, input your site one or any URL you want to set as authorized.
Once created, copy the Redirect URI, Client ID and Client Secret parameters.
5. Generate Refresh Token
Through your browser, visit the following URL, replacing the placeholders with parameters from the previous steps.
text
https://accounts.google.com/o/oauth2/v2/auth
?state=state
&access_type=offline
&response_type=code
&client_id=CLIENT_ID
&scope=LIST_OF_SCOPES
&redirect_uri=https://example.com
TIP
If there are multiple scopes, separate them with a comma.
You will get redirected back to the REDIRECT_URI with a code parameter in the URL, for example https://example.com/?code=4/P7q7W91a-oMsCeLvIaQm6bTrgtp7. Copy that code value.
Through an HTTP client like Postman, or your terminal using CURL, make a post request like the following one, once again, replacing the placeholders.
bash
curl --location --request POST 'https://oauth2.googleapis.com/token' \
--header 'Content-Type: application/x-www-form-urlencoded' \
--data-urlencode 'code=THE_CODE_YOU_COPIED' \
--data-urlencode 'client_id=YOUR_APP_CLIENT_ID' \
--data-urlencode 'client_secret=YOUR_APP_CLIENT_SECRET' \
--data-urlencode 'grant_type=authorization_code' \
--data-urlencode 'redirect_uri=https://example.com' \
You should get back a JSON response that contains the refresh_token you need, for example:
json
{
  "access_token": "1/fFAGRNJru1FTz70BzhT3Zg...",
  "expires_in": 3920,
  "token_type": "Bearer",
  "scope": "https://www.googleapis.com/auth/drive.metadata.readonly",
  "refresh_token": "1//xEoDL4iW3cxlI7yDbSRFYNG01kVKM2C..."
}
6. Authenticate
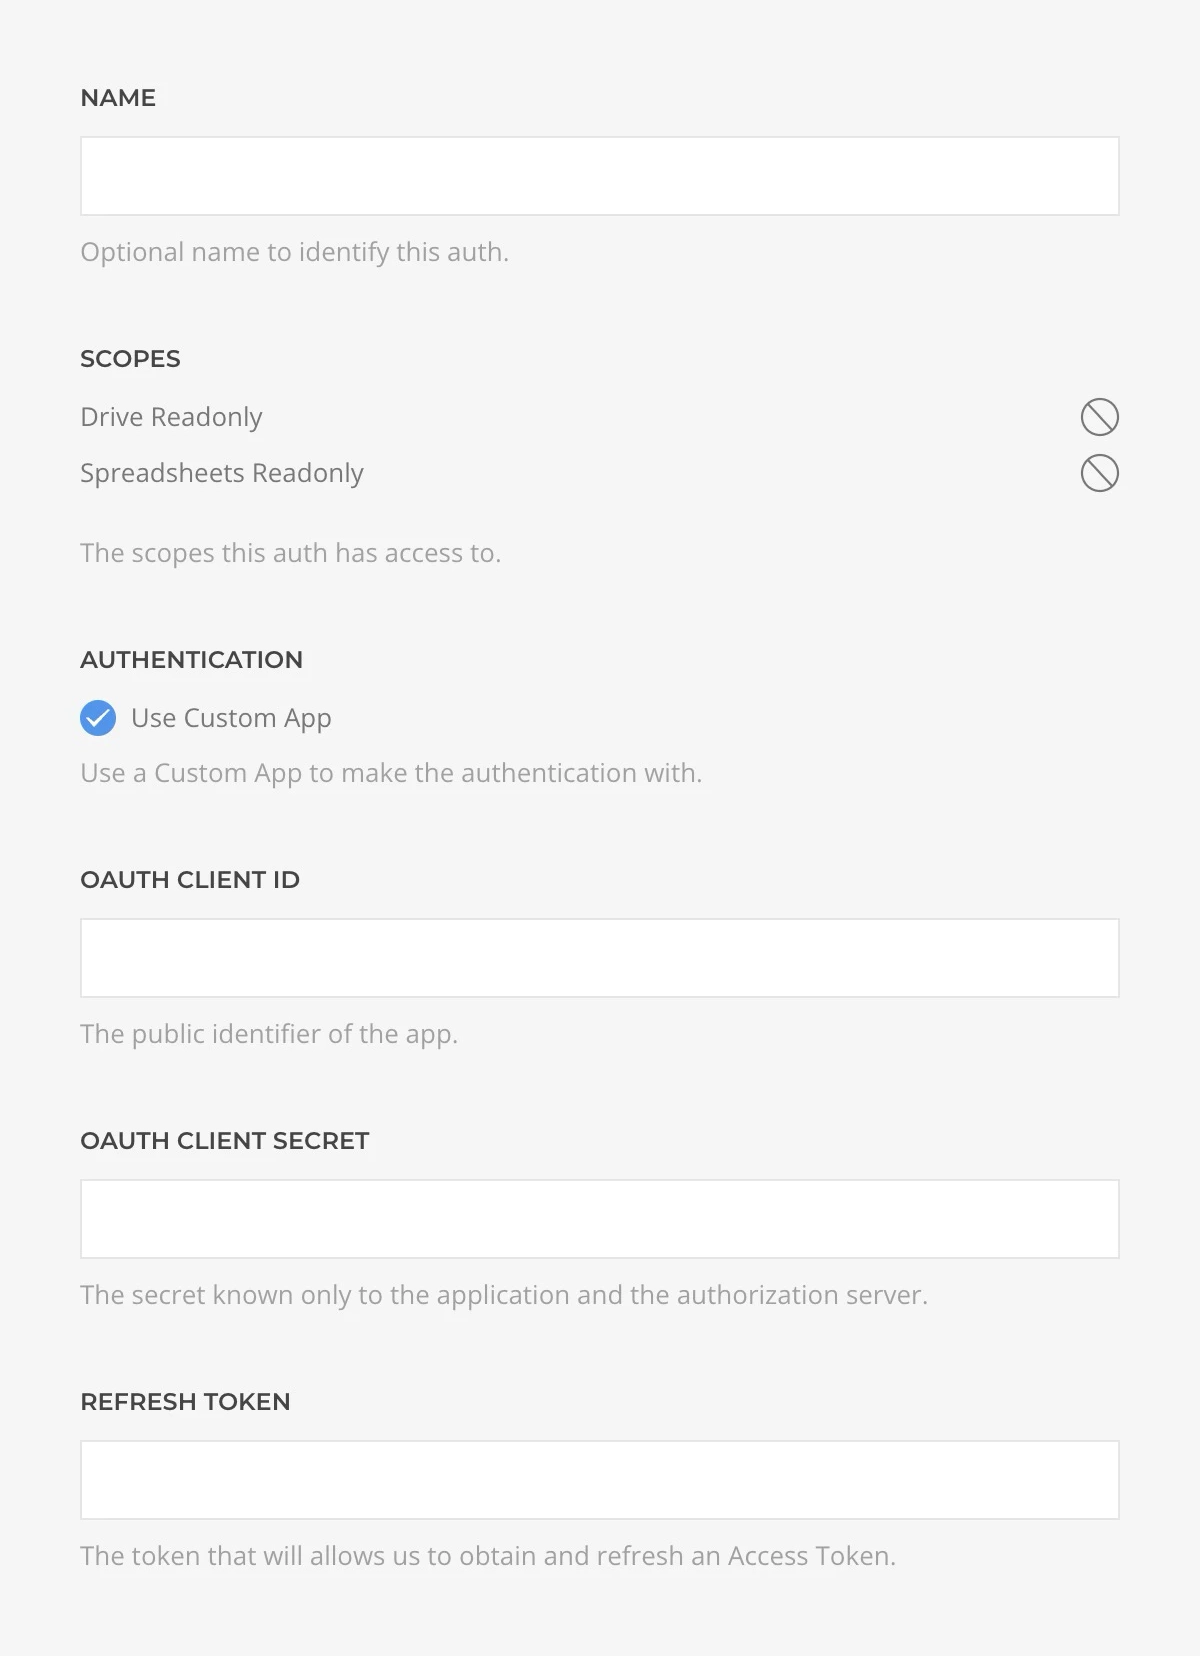
When creating a source or action that requires Google authentication, choose Custom App and fill in the details using the Client ID, Client Secret, and Refresh Token obtained in the previous steps.